Once we completed the interior sides of each fracture zone, we checked to see how securely the new fiberglass on just the inside was holding the shell together. Things looked pretty good, so we removed the plywood braces and addressed the exterior sides. When Carl was applying the layers of fiberglass, we noticed that the adhesive tape that we had applied to the exterior sides had bulged out. So our first step was to ensure that no parts of the fresh fiberglass protruded beyond the finished surface. It had in some places, so we used the grinder and the sander to carefully take those places back down below the desired finished level.
Next, we applied one layer of woven mesh, followed by one or two layers of chopped strand mesh. Then we sanded the edges once again to take the levels down to a point just below the finished exterior surface. Bondo body filler went on next and was easily sanded smooth with the orbital sander. Even the concave curves of the roof line achieved a smooth contour. I didn't get any photos of these last stages of work, but here are some showing the trailer as we prepared it for winter storage.
 |
| Looks all right, eh? |
We prepared the trailer for winter storage by cleaning up some of the old butyl caulking from the window frames.

Then we placed them back in the trailer, holding them in place with wood screws and small pieces of plywood in each of the four corners.
 |
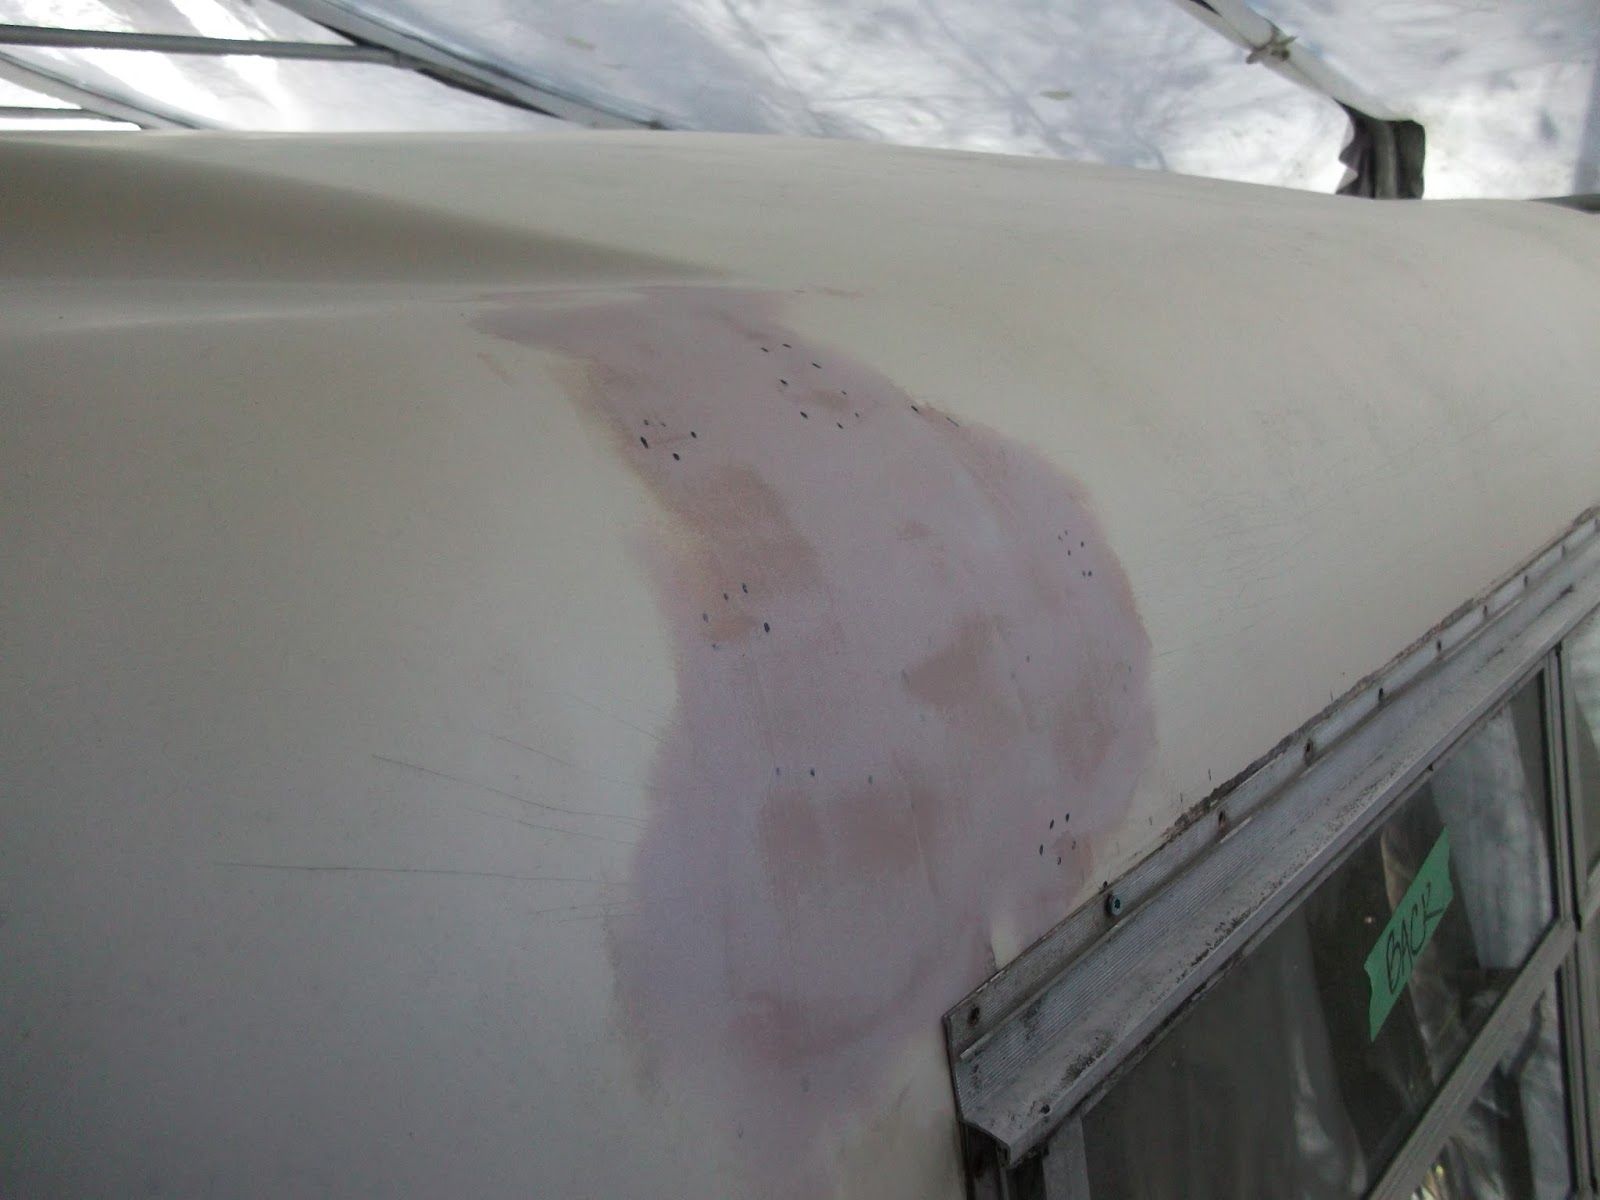
| Here is the area above the front window, with sanded Bondo finish. |
 |
| And the area above the rear window. Those black dots are just Sharpie marker bleeding through the Bondo. |
 |
| Inside we've put some of the trailer parts, including the doors and the mattress cushions. No doubt we will be replacing all of that, but we thought we might need the old ones for reference next spring. |
 |
| With strips of Ensolite hanging down, it's not a very inviting abode. |
 |
| And here she is inside her winter shelter. |
We won't do any more work on this trailer until next spring. Over the winter we will make lists of jobs to do and appliances to purchase. Then we will source-out all the parts and components we'll need, and make a budget for all the work. Carl has a couple of colour schemes in mind.
But it's good to know that this trailer now has structural integrity; the obvious damage to the shell that may have discouraged a lot of potential buyers is no longer an issue for us.


I just bought a 1975 Boler and am finding your blog really interesting, I look forward to reading the next adventures with the inside of the Trillium! I'm planning on re-covering my Boler cushions and love the work your wife did, hope mine turn out half so good!!
ReplyDelete