Tuesday, 27 May 2014

Eggs On The Run 2014: Our First BolerFest

This past weekend, my wife and I attended our first fibreglass trailer gathering.  It was the "Eggs On The Run" event held at the Cobourg East Campground near Cobourg, Ontario.  And it was just the third excursion we have made with our newly rebuilt Boler.  We arrived in the rain late on Friday night, and our set-up went smoothly.  It was pretty much straight-to-bed following a glass of beer.
In the morning, we said hello at the registration tent and then got set for a tour of nearly everyone else's trailer.  Here is a photo exhibit of some of the trailers we saw.
Eggs On The Run 2014 - Registration tent
Eggs On The Run 2014 - The Rear of the Headquarters

Eggs On The Run 2014 - Patriotic Boler

Eggs On The Run 2014 - Contrasting Geometry

Eggs On The Run 2014 - Great colour scheme

Eggs On The Run 2014 - Front stone guard with image of this Boler

Eggs On The Run 2014 - Colour-coordinated propane tank

Eggs On The Run 2014 - Nice flower & bird design, from Quebec

Eggs On The Run 2014 - My next-site-neighbour: we're a bit hidden by his car!

Eggs On The Run 2014 - Boler painted to match the Honda. Interesting window installation!

Eggs On The Run 2014 - The only U-Haul in attendance

Eggs On The Run 2014 - Boler with classic Chev to match. You ought to see the interior decorating!

Eggs On The Run 2014 - Cadet with custom woodwork inside

Eggs On The Run 2014 - Boler with power, water and jerry-can septic tank

Eggs On The Run 2014 - Casita and Bigfoot: high-end comfort
We had a lot of fun at this trailer gathering.  We don't think we'll make it to Bolerama: Hitchstock in July, but we're sure we'll make appearances at other events in the coming years.  A big "thank you" to the organizers of Eggs On The Run!
Eggs On The Run 2014 - Some very nice people that we met, and hope to meet again

Sunday, 25 August 2013

Before and After Pictures


Cushions and Curtains

I think my wife did a great job sewing the curtains and the cushions.  Here's the overall look:
The side curtains hang just to the back cushions, and the rear curtains come down to the table. They are able to overlap slightly where the two panels meet, so they block directly sunlight quite well.


And here are some details about the curtains:
The curtain rod is made by "Levelor", and it's a cafe style rod that clips into a very small brass bracket.  The bracket sits quite close to the wall, so there isn't much of a gap between the aluminum window frame and the top of the curtain.  The bracket is mounted at just about the same height as the originals -- I used the original holes as a reference.
My wife used a heavy woven cotton tape for the hidden tabs.  I'm not sure what that tape is called, but it was in the "bias tape" section of Fabricland.  She allowed about a 1" header.
The curtains are lined with a "satine" curtain lining.  My wife followed instructions that she found on the Internet -- she just Googled "hidden tab curtains."


Here are some details about the cushions:
I already posted some notes about sewing the cushions, so I won't go into too many details here.  This photo shows how the "boxing strip" rounds the corner to the zipper end.  Note how the "piping", which is the cord running around the two perimeter edges, defines the shape of the cushion.
 Now, the one big mistake we made with the cushions was to use the same 4" thick foam on the back of the front bench (upper bunk) as we used everywhere else.  Two things happened: it pushed the lower cushion out too far forward, and it prevented the hinged side-ends of the upper bunk from bending as they should when in bench-back position.  I ended up replacing it with 2" foam and then everything fit perfectly.  I'm going to keep the piece of 4" foam in case I find another Boler to rebuild!
In this photo you can see that the bench-back did not get piping.  In fact, it wasn't sewn at all.  I carefully stretched the fabric to the plywood at the back and stapled it in place, allowing some slack at the side hinges.  Then, on the recommendation of a nice lady at Fabricland, I rolled the edges of the backing fabric over a 1/2" strip of cardboard-tape made specifically for this purpose, and stapled it in place.  It made for a neatly finished edge.  The staples are visible, but barely, and they'd only be seen if someone were lying on the bottom bunk looking up.
Most of all, I really like the fabric we chose.  It's marketed as an outdoor furniture fabric, so it's fairly UV and mildew resistant.  The pattern and the colours really work with the 1972 thing, too.

Wednesday, 14 August 2013

Propane stove and fridge

I bought a "Suburban" 2-burner stove and a small Dometic 3-way fridge.  I also bought a new regulator and a 20 pound propane tank.  There aren't any RV dealerships or service centres in my area, so I began calling around to local heating and air conditioning companies to see if I could get someone to hook up the gas lines for me.  I got a few "maybe" answers, but no one seemed willing to book me for a specific day and time.
I ended up buying my 3/8" copper tubing, flare fittings and a flaring tool, and I did the installation myself. (I am getting a licensed gas fitter to check my work.)
It went pretty smoothly once I figured out how much tubing had to extend beyond the flaring tool block to get the right size flare.  I didn't have much room to work at the back of the fridge -- just enough room for two wrenches and nothing else.
The back view of my Dometic RM 2193 fridge, flaring the ends of the copper tubing.
With just two appliances, the lines were quite simple: tank to regulator to a tee going to the fridge and stove.  The stove section went first, then the length from the regulator to the tee, then a short length to the fridge.
I got frustrated with the flexible pigtail connector between the tank and the regulator.  My RV supplier didn't send me a pigtail with my big parts order, and I was told that I could buy one at Crappy Tire.  And yes, I did find a connector hose made for RVs at Crappy Tire.
Tools and fittings, including the non-standard connector hose from Crappy Tire (POS!)
In fact, it was made by the same company as my regulator.  But the stupid thing had a non-standard threaded male fitting.  It was described as a 1/4" inverted male flare, but standard 1/4" flare fittings have a different thread.  This thread appeared to be a compression thread.  Crappy Tire had no other connector hose available.  In the end, I found a standard hose at a heating company.  The gas fitter there said he had never seen the kind of fitting on the Crappy Tire hose before.
Well, I got the gas connected, tested for leaks using a soapy water solution (yes, I found two and quickly tightened them up) and both appliances are running fine.  There's no gas smell, no bubbles, and the CO/gas detector hasn't made a sound.
Another view of the kitchen, with the Suburban cooktop.

Plumbing

I thought this part of the renovation would go quickly and easily; it took longer than expected.  The original plumbing consisted of a small PVC water tank, a 3/8" poly water line, a Coleman hand pump and a shallow avocado-green enamel sink.  The water inlet was a fairly large gravity port that functioned like a rectangular funnel, with a "lid" rather than a screw-cap.  The sink drain was a length of 1/2" garden hose popped through a hole in the floor of the cabinet.
The original gravity fill port.
The original sink.
The old leaky fresh water tank.
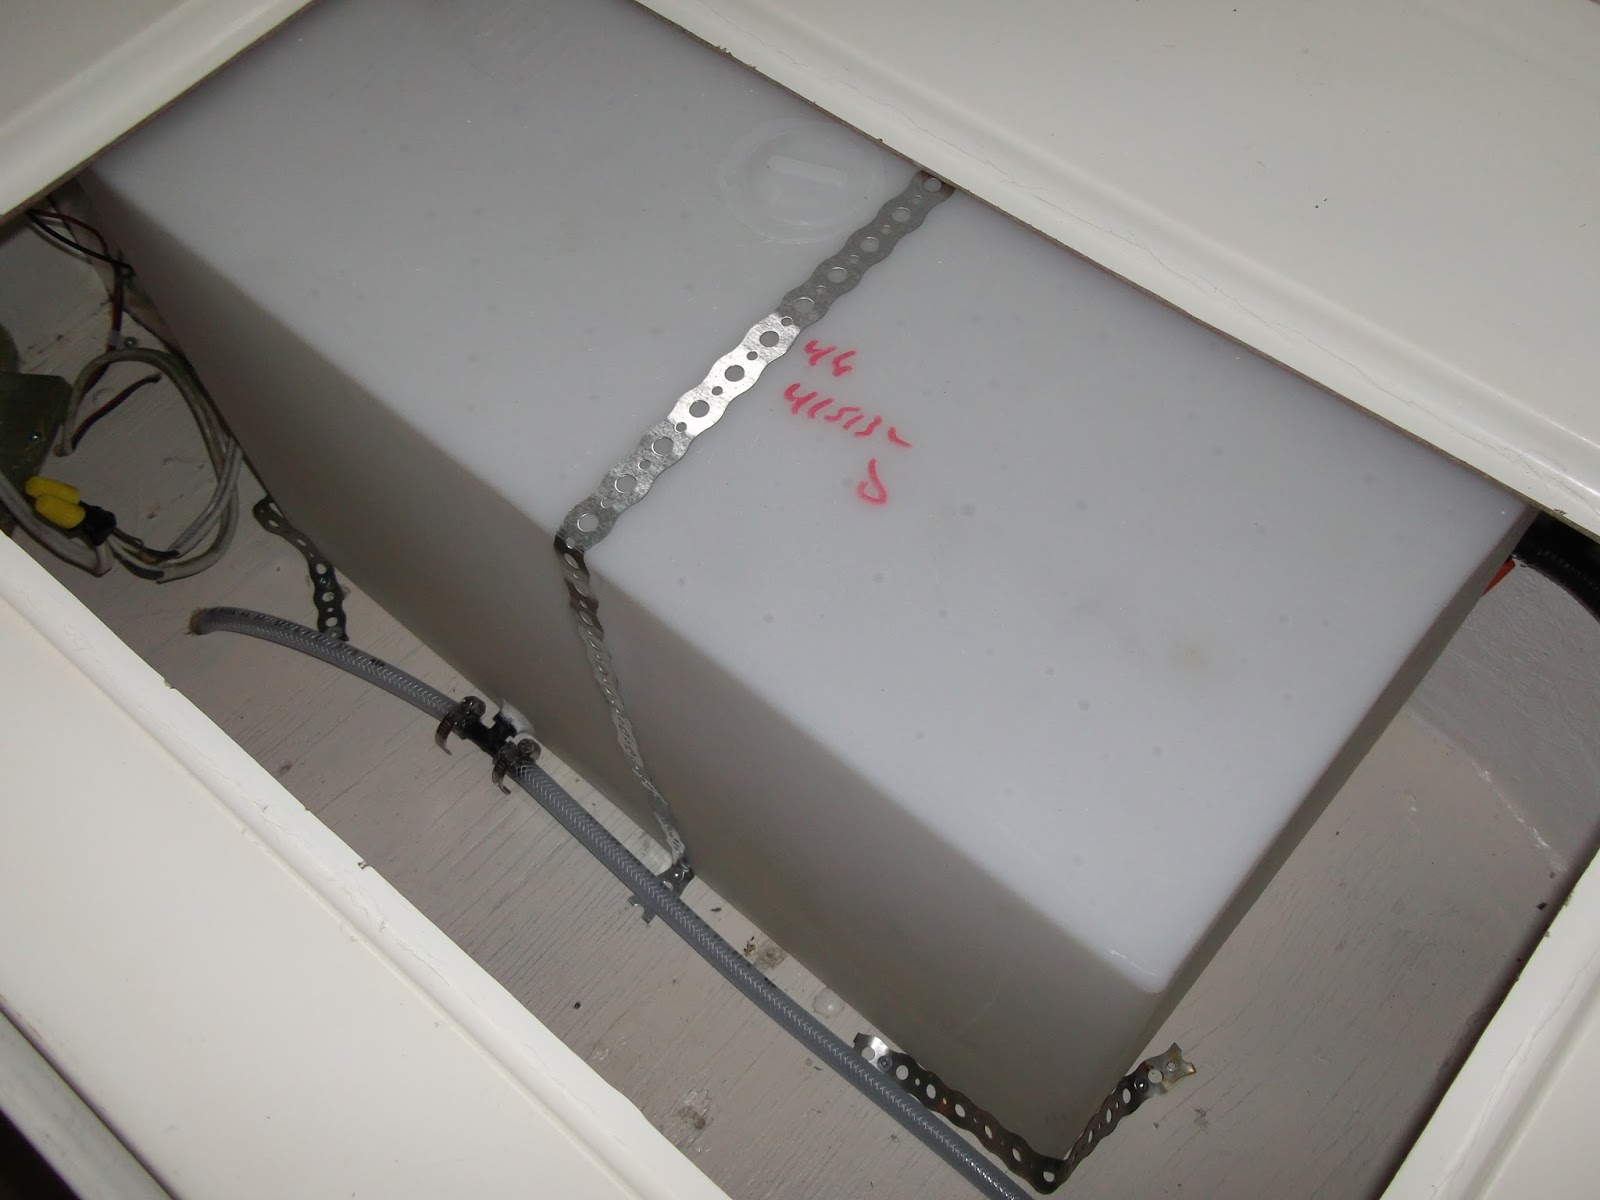
My new system starts with a new inlet -- almost identical to the kind I had on my Coleman tent trailer.  The water passes through a short length of 1 1/4" poly tube into a new 14 gallon (US) tank sitting underneath the right rear bench.  I have a drain valve below it, and then a new 3/8" poly line running to the back along the floor and then around to the driver's side bench.  Below that bench I have a new 12 volt water pump, and then a poly line up to the faucet.  I bought the only bar faucet that our local Home Despot carried -- an American Standard unit.  Then it's into a stainless steel sink I got at Ikea. The waste line is an ABS P-trap and then straight out the sidewall through an ABS 1 1/2" to hose thread/cap.
The new water inlet.
The new water tank.
The 12 volt pump, mounted beneath the left rear bench.
Ikea sink and American Standard bar faucet.
Waste water line.
Waste water outlet port.
The water tank story:  at first I thought the original fresh water tank would be fine.  I had tested it for leaks before installing it and found none, but when I hooked everything up I discovered that the seam between the two molded halves leaked.  I didn't think I could fix it, so I went looking for a new tank.  I ended up ordering a polyethylene tank through the "Coast Distributing" catalogue.  When it arrived I found that it had no bungs; it was just a completely sealed rectangular box.  I was in a hurry to get the trailer ready for use so I didn't bother with ordering in a special bung kit.  I just cut the two holes I needed and threaded my fittings into the plastic, and then applying sealant around the collars.  I tested it over a few days and had no leaks.
The Ikea sink story:  I chose the Ikea sink because it was about a hundred dollars less than the bar fridges sold at local hardware stores.  The problem with the sink was that the mounting clamps are crappy -- they're mostly plastic and they kept releasing while I was tightening them. It took about 2 hours to fasten the sink in place.  However, now that it's installed, it looks good.  It is a full-size kitchen sink, so filling up a big pasta pot, or doing the dishes, should be a little easier than with a bar sink.  The tall faucet spout will help, too.